Gareth's Tips, Tools, and Shop Tales - Issue #11
Build a Resin Curing Cabinet
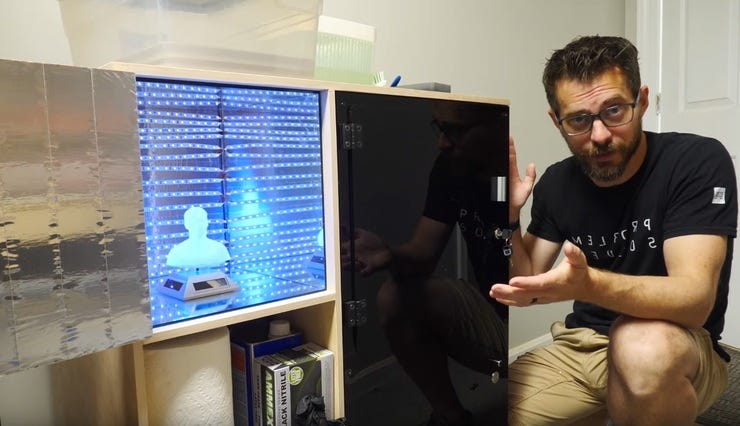
Greater numbers of more affordable "SLA" (Stereolithography) 3D printers are starting to make their way into the consumer market. Unlike their older siblings, FDM (Fused Deposition Modeling) printers, resin-based SLA printers require curing of the print under UV light. You can buy small UV light boxes for this purpose, but you can also very easily and cheaply make your own. Via Donald Bell's Maker Update show, comes this project from Bob Clagett of I Like to Make Stuff. Bob built a resin printing finish station, a simple cabinet that holds the printer, the printing supplies, and a curing cabinet outfitted with mirrors and UV LED strip-lights. As Bob points out, you could even more basically build a curing cabinet out of a cardboard box, reflective tape, and a strip of UV lights.
Izzy Swan Builds a Makers Playground
Maker extraordinaire and all-around awesome human, Izzy Swan, has teamed up with some other DIYers to create Makers Playground, a social media watering hole for fellow makers and breakers. Basically, the app is Facebook with some Instagram stirred into the pot along with a dash or two of Instructables. Frankly, I'm apprehensive about adding yet another social media stop along my busy daily digital commute, but I do enjoy the exclusive focus of the project.
Don't Forget the Bend Allowance
When cutting material that needs to be a precise geometry after it’s been bent into a desired shape, you need to take into account the deformation and curvature of the bend. This is known as the “bend allowance.” Bend allowance is impacted by the composition of the material and its thickness. You can find web-based apps online that will allow you to calculate these allowances for different materials and thicknesses. Just search on “Bend Allowance Calculator.” Find out more about bend allowance from This Old Tony. [This tip is taken from my feature in issue 20 of HackSpace magazine.]
The Power of Patience. And Wedges.
Jimmy DiResta recently acquired a huge vise that had been rusting away in a farmer's field for an age. If you've spent any time following Jimmy, you know that he loves bringing hopelessly rusted antique equipment back from the dead. He first bathed this vise in EvapoRust and then slowly began wedging the jaws open. There's an important lesson here. "Give me enough wedges, and a sledge, and I can unrust the world." Heat, wedges, and time. And EvapoRust.
TOYS!
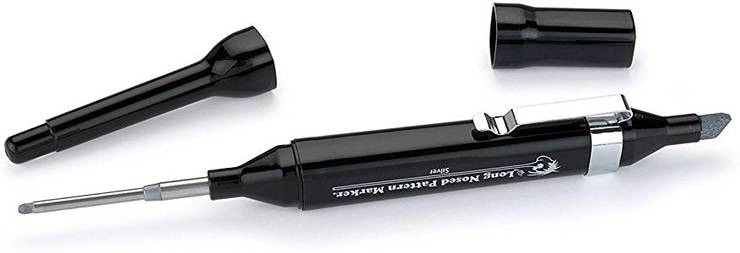
I've been seeing these "long-nose" markers on various YouTube maker channels for a while now and have wanted one. After listening to Donald Bell and Jordan Bunker talk about them on a recent Cool Tools video, I tossed one into my Amazon shopping cart. I ended up getting the two-headed marker. I love it. The narrow end has a working depth of 1-1/8" (28mm).
Shop Tales
Here's the first installment of a new newsletter feature, Shop Tales. This story, from my friend and Make: colleague, Caleb Kraft, is excerpted from my book, Tips and Tales from the Workshop.
Five Little Notches
My grandfather was handy with tools (weren’t they all?). He had a small woodshop and a collection of miscellany that had been acquired through years of working on various machines. At some point, he worked on trains; at another, he repaired vacuums.
When you’re working in shops with other people, it is always smart to mark your tools so that you know someone else won’t end up with them. My grandpa’s mark was five little notches or slashes.
I inherited many of grandad’s tools when he passed away. They’ve outlived many of the cheap, modern versions I’ve acquired during my workshop explorations. Those five marks have become something of a sign of quality in my mind.
Maybe I should begin marking my favorite tools. How would a CNC mill look with five notches on the side?
— Caleb Kraft


